My mother and I had a bag full of limes and a craving for something sweet. The cover of an old magazine on her coffee table featured a beautiful lemon pie. The lemon cupcakes with lemon curd (another Martha Stewart recipe) I made for a friend’s birthday a few years ago popped into my head. “Surely I can do that with limes…”

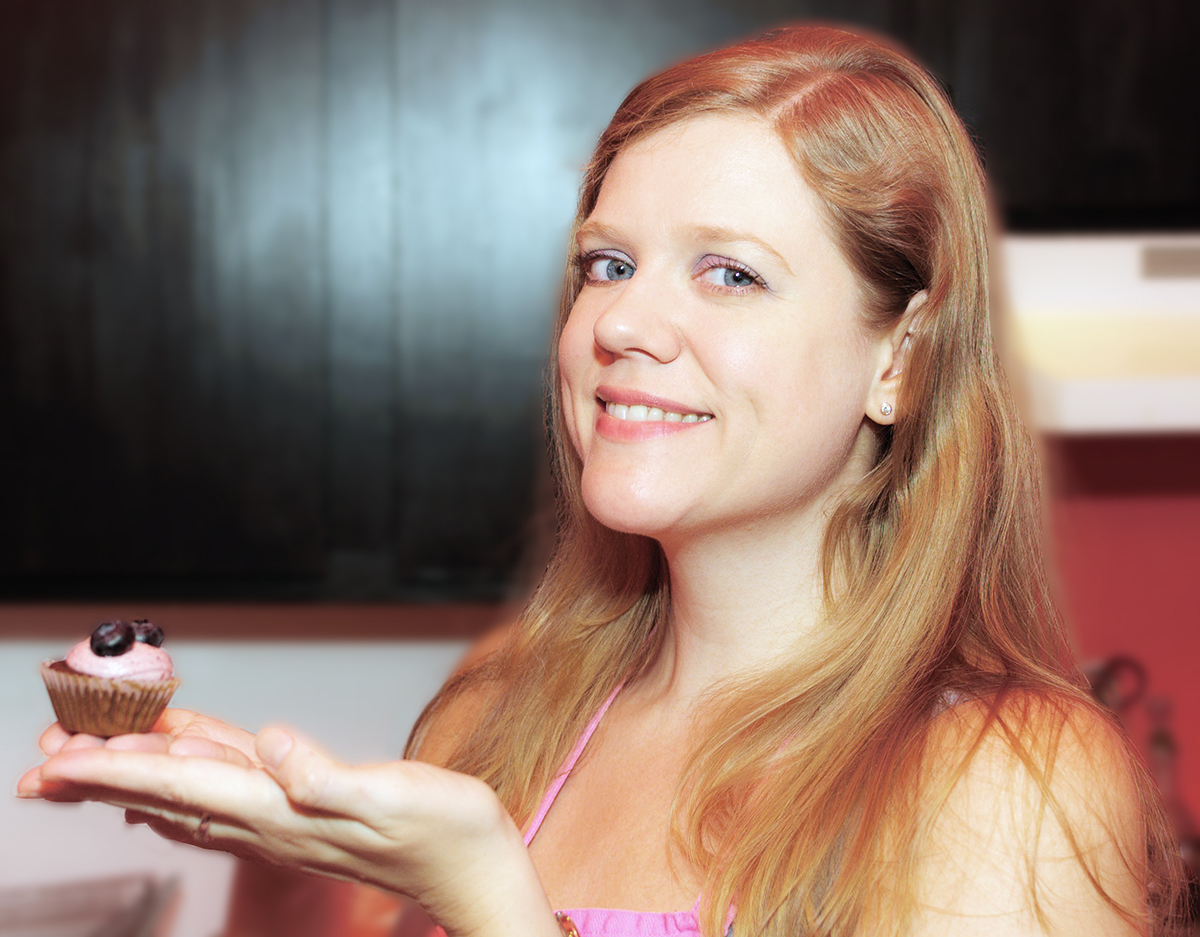
We got on our aprons and set to work! Mama started zesting and juicing, I began mixing the batter.

I missed my stand mixer, but I loved having extra counter space and a “sous chef.”

When it was time to separate the eggs, Mama had a surprise for me. Thank you to Kent of Follette Pottery for this amusingly disgusting gift to my mother, a nose (and ear and throat) doctor.

“Ewww…”

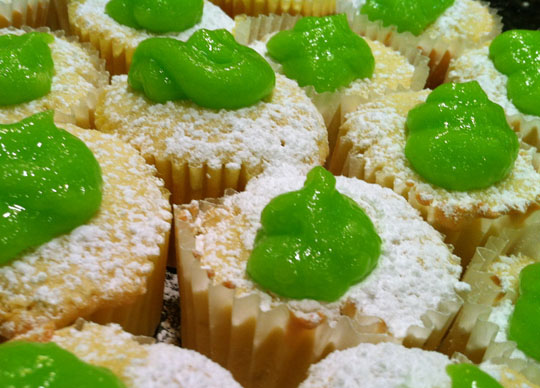
The lime curd was very yellow from the yolk. I added a drop of green food coloring. It looked awful, more slime than lime. I added a second to make it scream, “Lime!” (Or maybe… “Alien slime!”)

Martha Stewart’s recipe instructs inserting a pastry tip into the cupcake while piping to get curd in there. I didn’t have a pastry bag or tips, so I settled for a plastic baggy.  Since that wasn’t going to force any curd into the cupcake itself, I poked a hole about halfway in using the rounded end of a wooden honey dipper, which seemed about the right size (you might use a wooden spoon or similar implement). I dusted the cupcakes with powdered sugar, then piped lime curd into the holes, pooling more on the tops.

They tasted sweet and tart with a lovely lime flavor—delicate in the cake, strong in the curd.

Ready to try our creations!

Below are my modified ingredients to make these lime beauties. I halved the original recipe, which makes a huge amount! Find the full recipe (with lemons) in Martha Stewart’s 2009 cupcake cookbook, it isn’t available on her website. {Update: As of May 2019, the recipe is available in Amazon’s review of the book!} For the recipe online, see Today.com.

For 21 cupcakes
1 3/4 cups flour
1 tablespoon lime zest
1 tablespoon lime juice
1/4 teaspoon baking powder
3/4 teaspoons salt
1 1/4 sticks unsalted butter
1 1/2 cups sugar
4 oz. cream cheese
3 1/2 large eggs
1/2 teaspoon vanilla extract
powdered sugar

For plenty of lime curd
1 whole egg
4 egg yolks
1/2 cup sugar
1/3 cup lime juice
1 tablespoon unsalted butter
green food coloring (optional)

I wanted to make something special for a holiday party, so I decided to tackle Martha Stewart’s Chocolate Mint Cupcakes, complete with mint chocolate leaves. The recipe can be found online and in her cupcake cookbook.

mint chocolate cupcake
(Photo by Jason Yung)

I’m not ashamed to say that I am a Martha Stewart devotee. Some of her instructions in recipes and craft projects may be a little obsessive-compulsive, but she knows what she’s talking about. These cupcakes were more time intensive than others I’ve made lately, but they were worth it.

First, the leaves… It sounds a little crazy, but Martha’s recipe has you paint chocolate onto the back of mint leaves with a brush (one version says to use a paintbrush, the other indicates a pastry brush), refrigerate them, then peel off the mint leaf.

chocolate mint leaves
Mint leaves, newly painted (left) and after refrigeration (right)

What’s even crazier is that it worked! The chocolate leaves really came out looking like mint leaves. It was tedious to peel off the mint (I used sanitized tweezers), some broke, others melted with a touch of my hot fingers. However, I ended up with enough good-looking leaves to add one or two to each cupcake.

The cupcakes themselves were easy enough, though I felt the batter was especially thin. Noticing this as I mixed it, I added an extra 1/4 cup of flour. I know, going against Martha’s directions, but it felt like the right thing to do.

It was my first time doing this type of buttercream (a meringue buttercream of the French variety, involving yolks in addition to the egg whites), and I don’t think I realized what I was getting into. I was very glad to have 2 mixing bowls. I used my metal bowl for the steps requiring cooking in a double boiler (yolks/milk/mint and whites/sugar), washing it quickly in between, and the glass for the butter and final whipping.

meringue buttercream
Mixing the meringue into the minty butter-custard mixture

The frosting came out rich, but it was also light at the same time. It is very buttery, and might not be a match for all types of cake, but it works well on these particular cupcakes, in my opinion.

I iced the cupcakes a few at a time, peeling off mint from a chocolate leaf or two (fresh from the refrigerator or, after staying out a bit too long, the freezer) to add to each. I was pleased with the way they turned out.

mint chocolate cupcakes

Some who tasted them claimed they were amazing. They were on the rich side for me. I liked them, but one was plenty!

Invited to a barbecue with members of a fantasy baseball league as guests, I had only one choice. I had to make baseballs. Cupcake baseballs, that is!

Baseball Cupcakes

I baked up some chocolate cupcakes and frosted them with vanilla cream cheese buttercream. The cake recipe called for both sour cream and buttermilk, but I settled for three times the sour cream. Though my decision was based solely on the ingredients I had on hand, I was really happy with the results.

Piping the stitches was a little tedious–and I was late for the barbecue–but I did my best! I piped two arcs, then filled in the individual stitches, all in red. It took a lot more red food coloring than I expected (note to self, I need to stock up on food coloring gels), as I was determined not to show up with pink-laced baseballs.

The crowd seemed to think the cupcake baseballs delicious…once they stopped playing with them!

Playing cupcake baseball
Olgu and Jesse playing "ball"

Baseball cupcake

I decided to make cookies and cream cupcakes with cream cheese frosting for my boyfriend’s birthday party. He doesn’t like his sweets super chocolatey, but he is a fan of the Oreo. The recipe I used was from Annie’s Eats, except I did not put a cookie at the bottom. (I did add extras to the batter. No one complained.)

You see, I had another cookie idea, and it couldn’t be buried at the bottom of a cupcake.

penguin cookie cutter

My man, as it happens, is a fan of penguins. When I came across this cookie cutter in a local shop, I knew I had to do something with it for him.

I wanted a cookie close in taste and texture to an Oreo wafer, so I searched for a chocolate wafer recipe, settling on one from FoodNetwork.com. They didn’t turn out to be as intense in flavor as I might like, but in combination with the cupcakes, they worked. (And I perhaps like my flavor more intense than average.)

I iced their tummies, gave them eyes, and my waddle of penguins was ready to party.

penguin cupcakes

We had a lot of fun with these guys during the birthday celebration, both before and during their consumption. Watch the video.

The second photo is by me, the above and the nice cookie cutter shot are © Jason Yung.

Perhaps cupcakes aren’t ideal for sand, sea, and sun, but friends and I had planned a day at the beach, and it was the perfect opportunity to create seashore-themed treats!

Seashore Cupcakes by Amelie
Cupcake Amélie at Brighton Beach

I started by baking a batch from one of my standby recipes, the Classic Chocolate Buttercream Cupcakes from Fergel Connolly‘s 500 Cupcakes. I like making them when I want a less intense chocolate, they use just a few tablespoons of cocoa in the batter. They were my first cupcakes to get rave reviews, and they are my default when I need a sure thing and/or just want to concentrate on decoration.

Hurdle #1: Missing Ingredient

My first challenge of the night was a near-empty bag of self-rising flour, which I don’t often use. This particular recipe calls for it, though, and I didn’t have enough. So, I made some extra by adding 1 1/2 teaspoons of baking powder and 1/2 teaspoon of salt to 1 cup of regular unbleached all-purpose flour. Voilà, self-rising flour! (As an aside, I’m not entirely sure why this recipe calls for self-rising flour and additional baking powder, why not just call for regular flour, baking powder, and salt?)

Hurdle #2: Bottom-of-the-Barrel Blue

The real fun was making these into beach and ocean. I mixed up my regular Vanilla Buttercream Icing for them, putting cocoa in half the batch. I planned to color the rest blue for my faux water.

I pulled out my handy dandy box of food coloring, popped the top of the blue, and squeezed gently. Nothing. I squeezed harder. Nope. I ended up cutting the bottle open, scraping the coloring out with my finger and swirling it into the icing (yes, I’d washed my hands). There is still, several days later, a blue cast to that fingernail.

I grabbed a Wilton 1M tip, filled a pastry bag with the blue goo, and started piping without a real plan. I made squiggles, then peaks, starting to pipe more freely and aggressively.

“Choppy water!” both the friend who had joined me to decorate and I exclaimed in unison.

Ocean Cupcakes

Hurdle #3: Faulty Fondant

The fondant I had on hand, leftover from another project, was rock hard when we pulled it out of it the container I’d thought was airtight. Microwaving in 5-10 second bursts helped to a certain extent, but eventually we had to take more drastic measures, working soft butter into it.

Red Fondant

It was still a nightmare to work with. My friend made me throw out the excess, we won’t be working with that batch of fondant again! While I frosted the rest of the cupcakes with chocolate and made graham cracker “sand,” however, she did manage to make reasonably realistic starfish, beach balls, a towel, shark fins, and, randomly, a sunbathing alien. I arranged them as I saw fit, we added a few cocktail umbrellas, and called it a night. For amateurs, I think we did pretty darn well.

Seashore Cupcakes

Hurdle #4: Mr. Sunshine

It wasn’t a hot, hot day, but the sun’s warmth still did a number on the icing, melting my waves and making a mess of our decorations. (I feel a heat vs. icing experiment coming on… Stay tuned for a future post!)

Oddly, I think the taste was enhanced by the heat, especially for the chocolate-frosted cupcakes. The chocolate buttercream seeped into the chocolate cake almost to the point, in at least one case, of seeming as if I’d filled them with it.

On the cupcakes with the plain vanilla icing, however, it seemed to melt the butter from the icing into the cupcake, leaving plain sugar on top. It didn’t work as well as the chocolate, in my opinion, but it wasn’t a horrible occurrence. One friend suggested I melt butter on baked cupcakes, then ice them. I’m trying not to clog my friends’ arteries in one fell swoop, though!

All in all, they were a success, my sunbathing companions were pleased. We were even able trade one for a beer from a beach vendor.

“This is the best cupcake I’ve ever had,” he said. “I mean…” He looked around. “My sister isn’t here, is she? Really, this tastes amazing, better than any I’ve eaten before!” I think he was drooling a little.

My photographer—and fondant designer—for this post was Jennifer Pinkowski. Learn more about her and her work at www.jenpinkowski.com.