peanut butter chocolate cupcakes

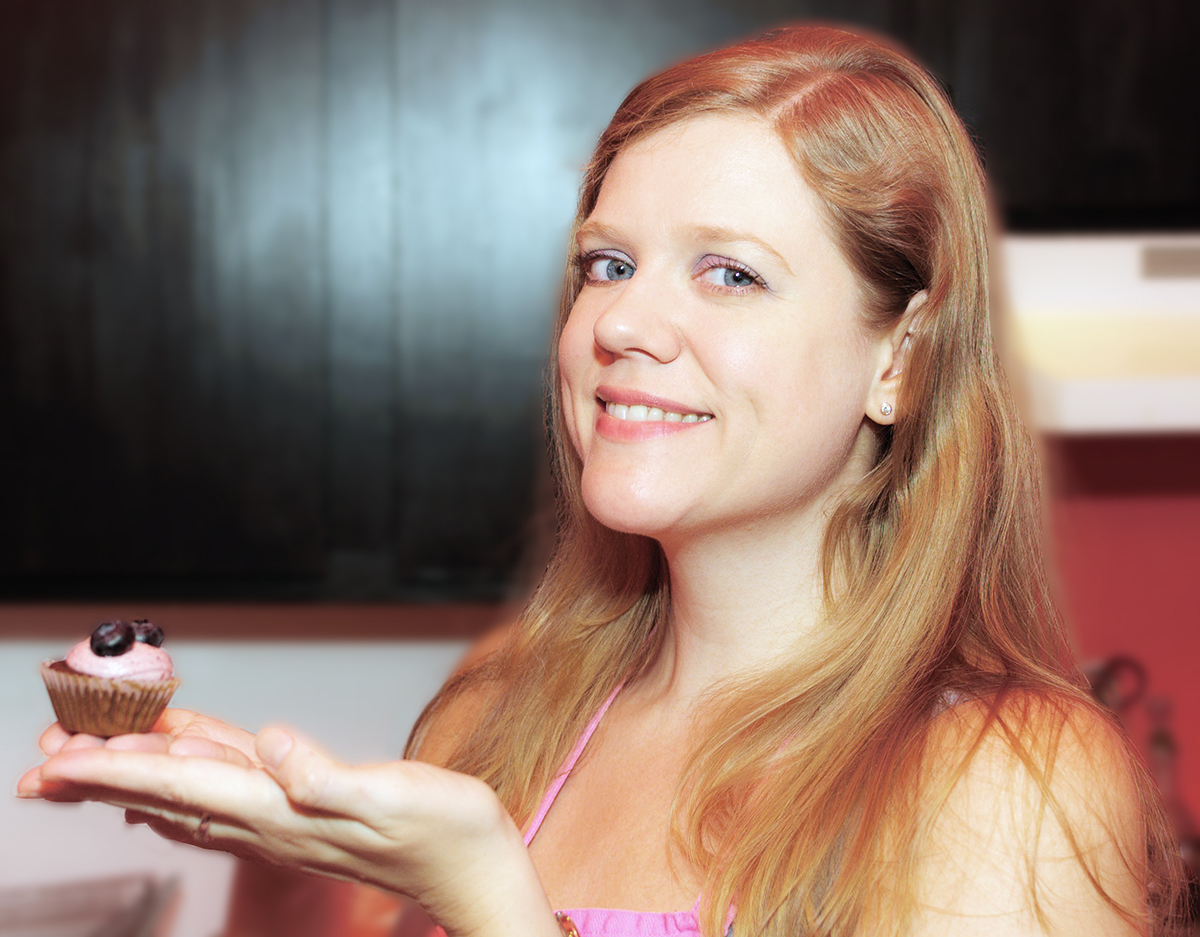
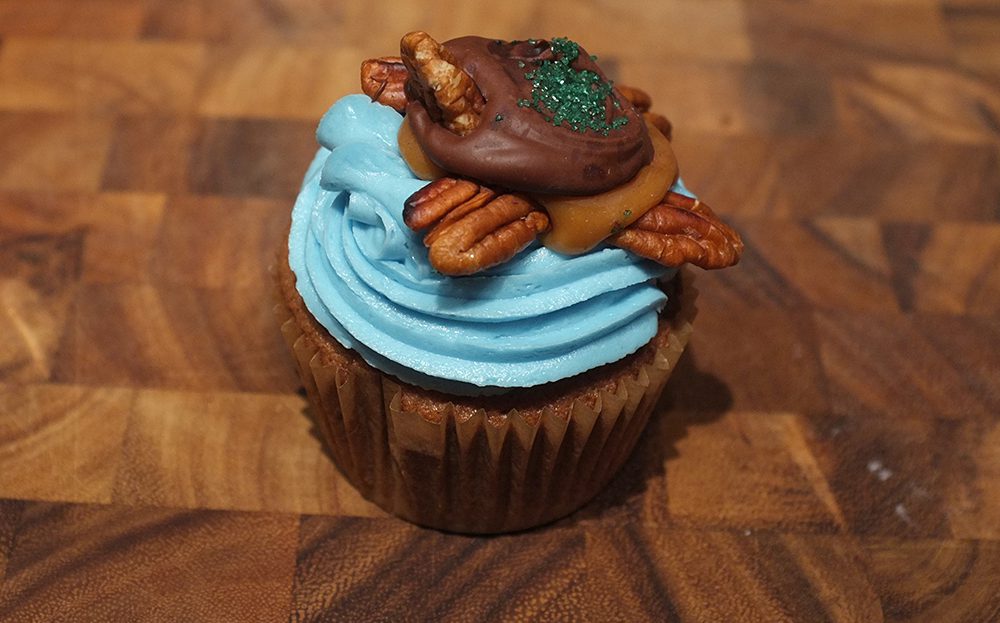
My husband is a fan of peanut butter cups, so I baked him a cupcake version for his birthday. It was one of those “big” ones, and we had a great party to celebrate.

peanut butter chocolate cupcakes

Peanuts, Inside & Out

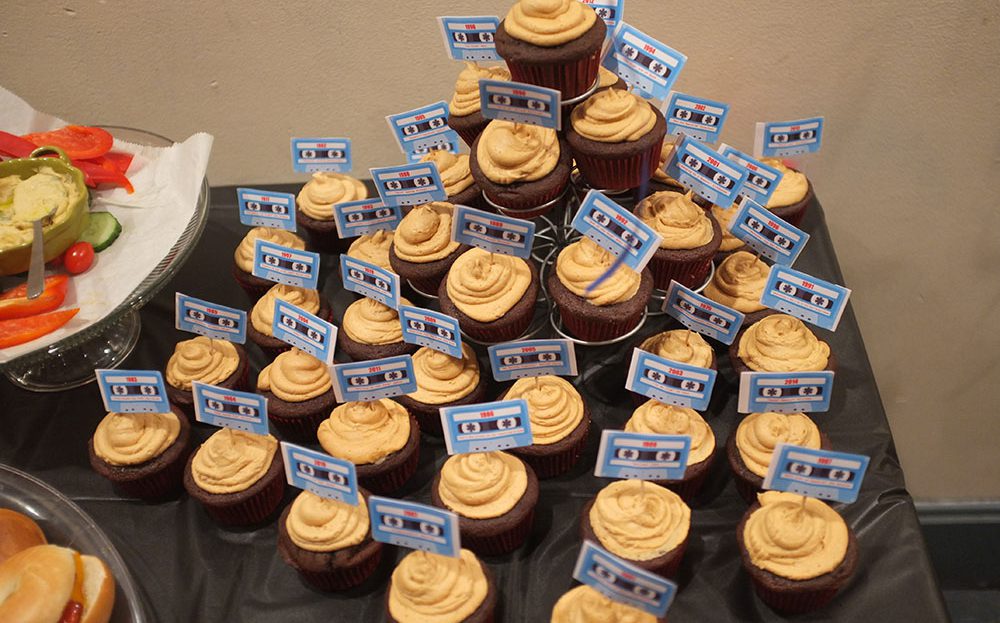
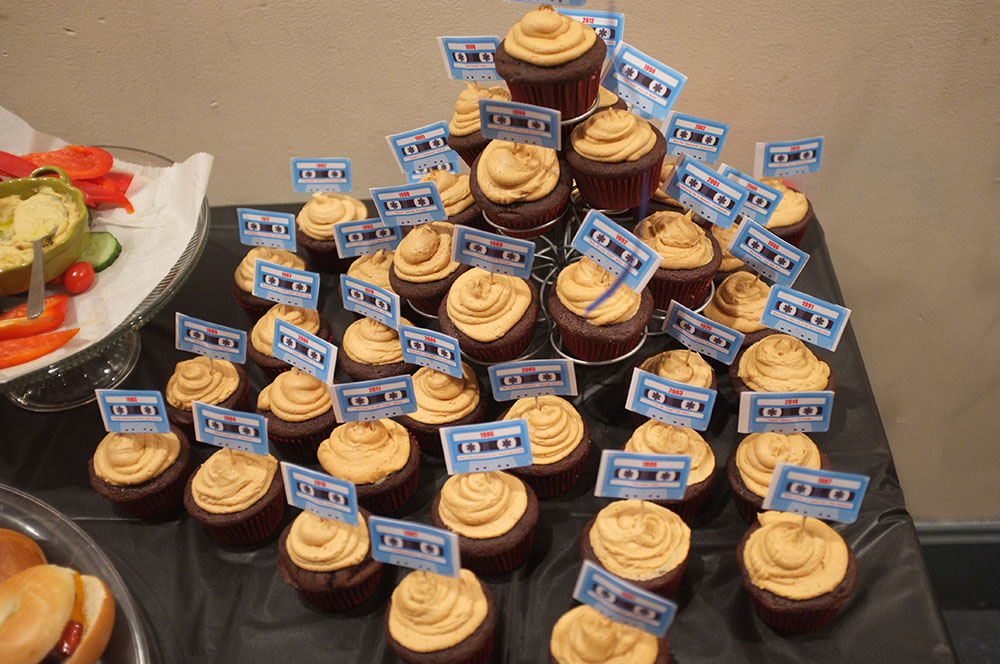
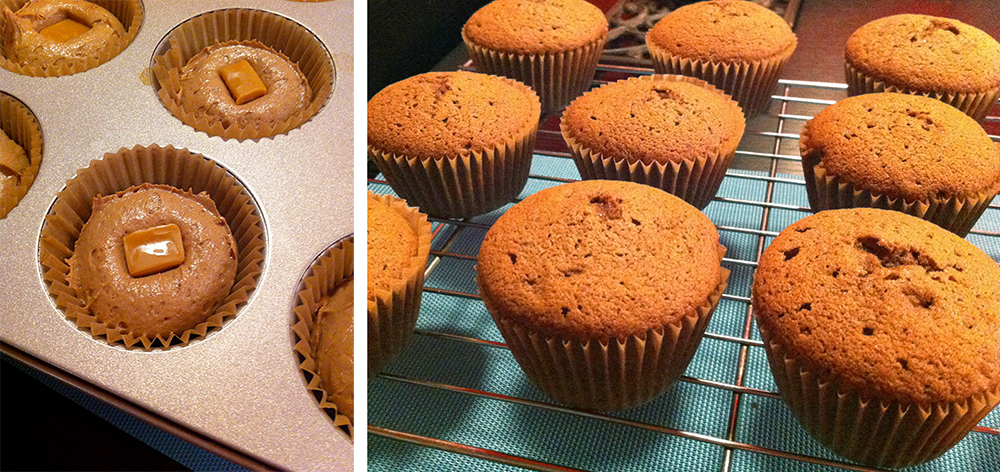
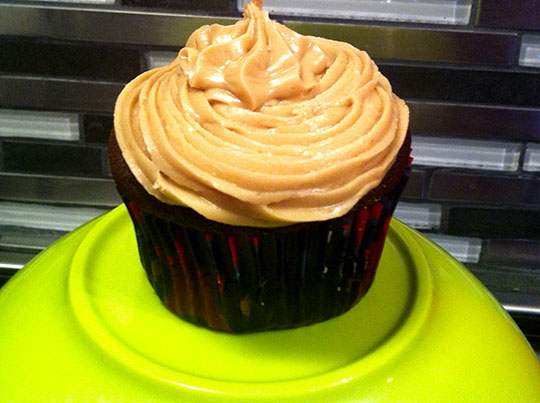
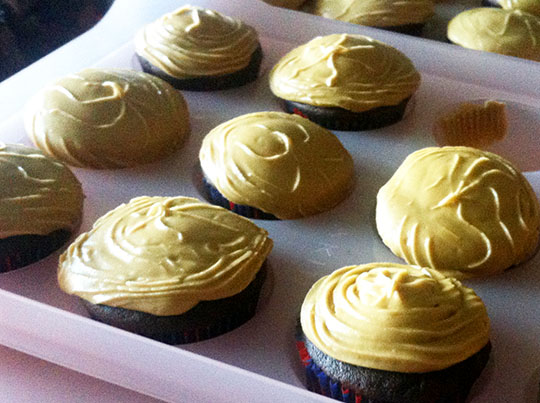
I started with my regular chocolate cupcake batter, then dropped a peanut butter ball into each. I made the balls by combining crunchy peanut butter with a little flour until I could roll it into spheres. Baked in, they made a peanuty center that was similar to the inside of a peanut butter cup.

I used smooth peanut butter for the frosting. (Recipe below.)

Party Décor

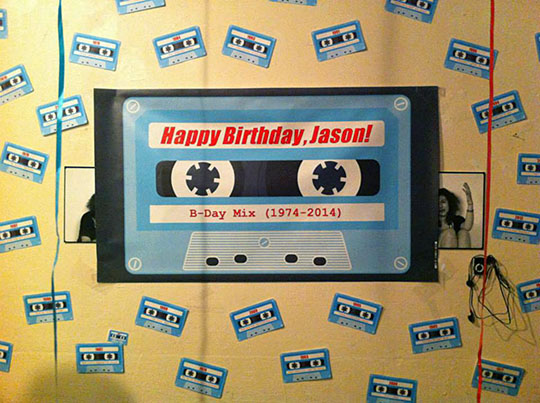
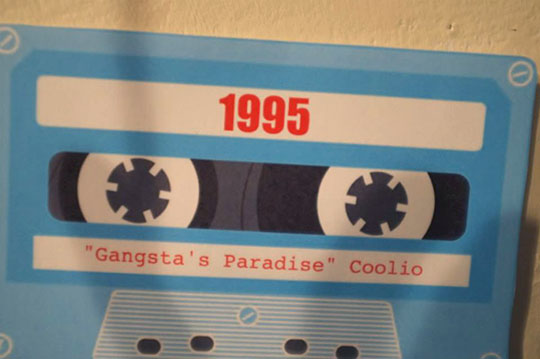
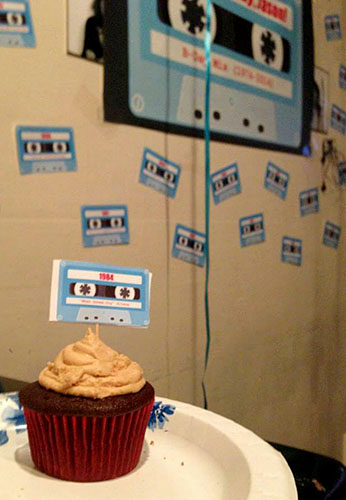
My husband is into music (playing and listening), and cassettes were the thing for most of our younger years. Thus the “Mix Tape” theme was formulated. I had an oversized cassette tape printed for the wall and made smaller tapes to hang around it. There was one with the top song (according to Billboard) of each year since he was born. I also printed two 2″ x 3″ mini-tapes for each year to create cupcake toppers.

tapes

tape

The Venue

There are many great bars, restaurants, and other event spaces to have a party in Brooklyn. The place that fit just right was Two Moon Art House & Café in Gowanus/Park Slope. It has a wine and coffee bar and in-house catering for refreshments, sound system for music and speeches, and a projector to play sweet messages from faraway friends (or embarrassing slideshows…your call!). Two Moon also has a garden patio, a nice place for guests to relax. The owners and staff are lovely and easy to work with. Thanks, Two Moon!

peanut butter chocolate cupcake

Recipe: Peanut Butter Frosting

Makes frosting for about 3 dozen cupcakes (depends on icing method)

2 cups creamy peanut butter
2 1/4 sticks unsalted butter
2 cups powdered sugar
1/2 teaspoon salt
2 teaspoons vanilla extract
1/2-2/3 cup cream

Beat together the butter and peanut butter, then slowly add powdered sugar and salt, followed by the vanilla extract. Mix in 1/2 cup cream and beat on high for a few minutes. If needed, add more cream or powdered sugar to reach desired consistency.

sea turtle cupcake

My friend Katie loves sea turtles*, so that’s the theme I ran with for her birthday cupcakes. I’d seen cupcakes with gumdrops made to look like turtles on top, but the first thing I thought of was turtle candy, the chocolate caramel and pecan treats that look like turtles.

Of course, the candy would need a cupcake base. I decided on chocolate cupcakes with a caramel center. I made the lighter chocolate cupcakes I like, leaving room for the caramel to shine.

caramel centers

I confess, I “cheated” and didn’t make homemade caramels. It’s just way too easy to drop an unwrapped caramel candy in the middle of each puddle of batter. When they are baked, you can barely see a sign that they’re in there, but there’s a caramel-y surprise waiting.

While my chocolate cupcakes baked, I made the turtle candy. I roasted some pecans, arranging them on foil in groups of four for my turtles’ legs. I then dropped a spoonful of melted caramel in the center of each pecan cluster. Next, I swirled on a spoonful of melted chocolate chips.

turtle candy

To complete my turtles, I made heads with half pecans and finished with some green sprinkles. Vanilla frosting colored blue gave my sea turtles a place to swim.

swimming turtle cupcakes

*Sea turtles are endangered. Learn more about the real turtles and how you can help protect them at www.conserveturtles.org.

The Cupcakes

Black and white cookies are a New York classic, so I thought I’d make a cupcake version for a returning native’s bridal shower.

cupcake tower with black and white cookie cupcakes

For these, I baked straight from Bon Appetit. Why muck around when their test kitchens already perfected a recipe for black-and-white cupcakes? One of my co-hostesses found them on good ol’ Pinterest, and—after inspecting the ingredients for NYC b&w cookie authenticity—I carefully followed the directions.

black & white cupcake process

The hardest part was getting the halves of icing exact. I had been thinking that any irregularities on the chocolate side would be more noticeable, so I did those first in case I needed to cover up imperfections. The white icing was not opaque enough, however, to allow for correcting when I added the second side. Next time, I might start with the white half.

They weren’t perfect, but I think they looked enough the part! And they tasted just right.

I believe it was the bride’s sister (and Woman of Honor) who called them “cupcookies” and began lobbying for more cupcake versions of various cookies. Maybe… What kind of cupcookies would you like to see?

The Wrappers

I made cupcake wrappers from NYC subway maps and from a design on the shower invitations. Making your own wrappers is really easy to do. Offbeat Bride has a great tutorial including a template. I found that my cupcakes were smaller than the template, so I trimmed until they fit as I wanted.

nyc subway cupcake wrappers

I made some rich chocolate cupcakes topped with a creamy, intense, sugary caramel on a hot summer day. They had to travel to a party in the trunk of a car.

chocolate caramel

And this is what happened to the icing:

melty caramel

So it goes! They were still tasty, even though some of the tops looked like topographic maps.

One of the survivors of this batch—a cupcake unexposed to the elements—featured in a (private) video for a friend’s birthday. I sampled the cupcake while my fiancé danced.

videoscreenshot


Buddy Valastro Son
Buddy Valastro, with his son, talks about his new easy-to-use decorating tools.

“Who’s afraid of fondant?” asked Buddy. Not me! Well, not anymore…

I recently had the opportunity to spend a morning with Buddy Valastro, some of the Carlo’s Bakery staff, and other food bloggers learning to work with fondant. Our tour and decorating workshop took place at the newest Cake Boss facility, 30,000 square feet in Jersey City’s Lackawanna Center on Grove Street. The space includes offices, kitchens, classrooms (for baking, decorating, cooking classes),  a tv studio and more. It’s impressive! So much baking and decorating going on at once…

Buddy and his team have designed a line of Cake Boss-branded baking and decorating supplies that will be available to the public this fall. (Learn more at www.cakebossbaking.com when it launches!) These products are aimed to be easy for the lay baker to use and include things like fondant cutters and tools, cake turntables for decorating, mixing bowls, and cake pans. The idea is that anyone can decorate a great cake with the right tools. Proving this point was where we amateurs came in.

fondant

We were given fondant, tools, instruction, and a “dirty iced” cake on which to experiment.

First, we rolled out the fondant. We had the help of a machine, but this can be done by hand. Covering the cake was probably the trickiest part, it is hard to get it smooth without tearing the sheet of fondant or leaving bubbles. Finally for this first stage, we trimmed off the edges with a cutting tool (a.k.a. a pizza cutter).

fondant_bow

To make a bow we cut strips of rolled-out fondant with the tools provided and arranged on the cake. A little water and a paint brush worked as “glue.” We also cut circles with cookie/fondant cutters to add dots of various sizes. A trick, the Cake Boss-ers told us, is to steam a fondant-covered cake to easily decorate with pieces of fondant. That day, we didn’t need to use anything. It was humid enough that they’d stick right on.

bluedotcake

It was fun to learn to work with fondant. I don’t know that I am getting into the heavy-duty decorating game, but it’s not a bad skill to have up my sleeve! I still prefer the cake and buttercream beneath the pretty layer. That fondant does keep the cake nice and fresh, though!

finished cake
Ready to eat!

Thank you to Carlo’s Bakery and JS Public Relations. Follow @cakebossbaking to learn more.